CIRCLE SKIRT
JULY 6, 2008 I used to think that a gathered skirt was the easiest skirt to sew. But I may have changed my tune. A circle skirt is possibly even easier!….especially if you leave the elastic exposed.
 If you’ve ever made a poodle skirt before, it’s the same concept. Your fabric is cut in a circle, like a donut. Then the elastic is sewn on top to create a waistband. The circle hangs right from your waist and allows the fabric to drape beautifully around you.
 Once you’ve created your pattern, you can whip up 4 skirts in an hour! Make them for your kids! Make one for you! Make one for every birthday gift coming up. These are definitely my new go-to present.
 Okay, let’s get started.
(NOTE: Additional tips for making an ADULT SIZE SKIRT are at the very end of this post)
If you’d like to watch the video version, hit the PLAY button below.
If you’d like step-by-step photos, scroll past the video below:
If you’d like step-by-step photos, scroll past the video below:
What you need (for a little girl’s skirt):
* about 1 yard of fabric
* appx 3/4 yard of 2-inch wide elastic
* about 1 yard of fabric
* appx 3/4 yard of 2-inch wide elastic
FABRICS to use:
* Rayon
* Polyester Charmuese
* Simple Cotton
* Thin Corduroy
* Lightweight Wool
Many fabrics will work for this project. Lightweight fabrics will be more bouncy, and synthetic rayons and polyester will slink and spin around beautifully. The gray fabric we’re using today is rayon with a subtle visible weave pattern.
FOR WOMEN: Avoid fabrics that are medium weight or thicker as they may add extra bulk around your hips. In the polka dot skirt above, I used a silky polyester charmeuse (feels like a silk scarf). It drapes beautifully and keeps the padding down.
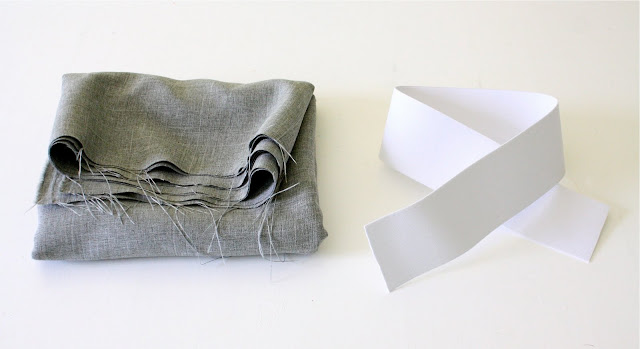
ELASTIC:
Wide elastic from fabric stores typically comes 2 inches or 3 inches wide; white or black in color. I recommend 2-inch wide for a girl’s skirt , and 3-inch for an adult.
Wide elastic from fabric stores typically comes 2 inches or 3 inches wide; white or black in color. I recommend 2-inch wide for a girl’s skirt , and 3-inch for an adult.
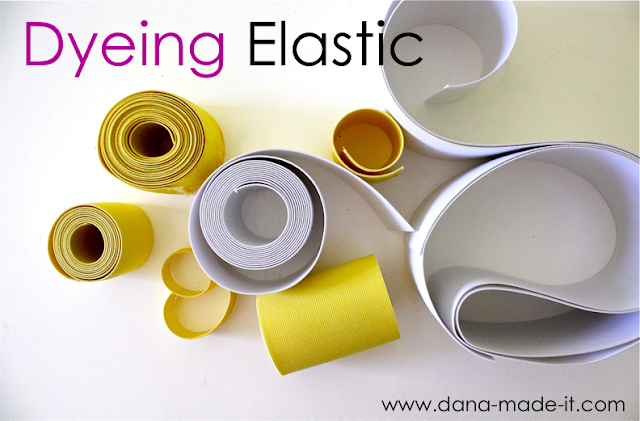
If you’d like to add a colorful twist to your skirt, check out our easy Tutorial for Dyeing Elastic HERE.
 Measure around your girl’s waist. You don’t want it to be so tight that she can’t breathe. But if the elastic’s too loose on her waist, it will look funny. So measure as precisely as you can and add an extra 1 inch for your seam allowance. For Lucy’s skirt, she measures 19 inches around the waist, plus an extra inch = 20 inches of elastic.
 PATTERN:
This requires a bit of geometry but don’t worry, we’ll break it down for you. I’ve tried to keep it as simple as possible with a small diagram and a few definitions:
Circumference = the entire distance around a circle (in this case, your waist length, plus 2 inches)
Radius = the distance from the center of the circle to the outside of the circle
pi (that funny symbol below) = 3.14 (approximately)
Radius = the distance from the center of the circle to the outside of the circle
pi (that funny symbol below) = 3.14 (approximately)
You need to figure out the radius so you can easily draw a circle. If you remember from math class: Circumference = 2 x pi x r (radius). I’ve flipped the equation around a bit and came up with this diagram:
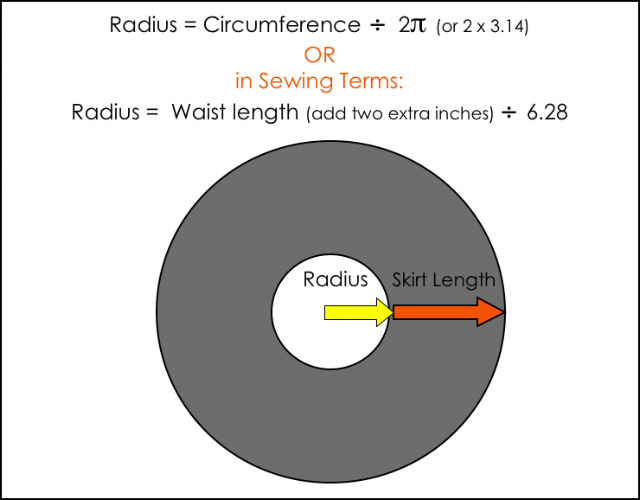 Let me break it down a little more:
* Measure your waist
* Add two inches to that number. You need these extra two inches so the fabric has “give” and will actually “stretch” when it’s sewn on to the elastic. It will create a very subtle gather to the skirt but will make it easier to get the skirt on and off. This will make more sense as you sew.
* Take your “waist + 2 inches” measurement and divide it by 6.28, and you have the radius!
* In Lucy’s case….
Her waist is 19 inches, plus 2 inches = 21 inches divided by 6.28 = 3.3 inch radius.
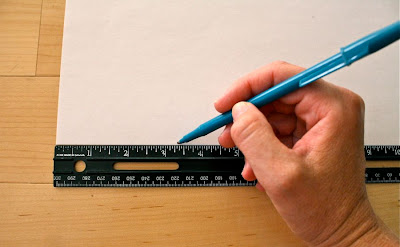
(NOTE: One method for drawing your circle is to tie string or yarn to a pencil, hold the string in the corner of your paper and draw, just like you did in grade school with a compass. For me it was easier to use a ruler, which I’ll show you below. So do what works best for you!)
* You only need to draw 1/4 of a donut circle for your pattern, so….
* Take a piece of paper (or many pieces of paper taped together).
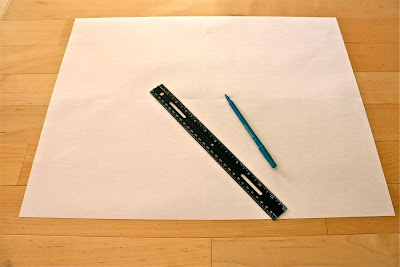 *In the bottom left corner, at the right angle, place the end of a ruler and measure and mark the radius in various places. It might be hard to figure out on a ruler where 3.3 inches is, but do your best. Since the skirt has a small gather to it, you have room for error.
 Then connect the dots to draw 1/4 of a circle! Just free hand it. With enough markings, you can draw it pretty well.
 * Decide how long your want your skirt to be. Lucy’s gray skirt hits her about an inch or two above the knee, and her skirt length is about 9 1/2 inches. Add an extra inch for the hem and the top seam (near the elastic). It’s always best to make it slightly longer than you think, so you have room for error. You can always cut length off as you create the hem.
* With your ruler on the edge of the circle just drawn, measure and mark the skirt length in various spots on your pattern, and
 draw another 1/4 circle:
 Now you have a donut! (or at least 1/4 of it). Cut off the center circle and your pattern is ready.
 Let’s cut the fabric….
* Fold your fabric in 4ths, so you have a right-angled corner to work with. Lay your 1/4 donut pattern on top, so that the edges hit the edges of your fabric. Mark it and cut!
 When you’re done, it should look like this (the skirt is folded in half):
 First, finish off the top of the skirt. Serge around the waist. If you don’t have a serger, you can zigzag the edge, leave it raw, or iron the waist down 1/4 of an inch and iron it down another 1/4 of an inch. It just depends on your preference. Personally I don’t like any raw edges in my garment since it starts to fray as you wash.
 When you’re done it should look like this:
 Let’s sew the elastic waistband.
With the elastic folded in half, sew it together, using a 1/2 inch seam allowance:
 Next, if you prefer, serge each seam edge separately to seal off the raw edges. Do not serge the seam together since you’re going to be fanning it out.
 Fan the seam out and sew down each side. This will help the waistband lay flatter on your skirt.
 I use the inside of my presser foot to guide me down, so I’m sewing evenly on each side.
 When you’re done, it should look like this on the right side:
 Add a label if you’d like and you’re ready to attach the waistband to your skirt. It’s always best to try the elastic band on your child before sewing on the skirt. I made this mistake and when I tried the finished skirt on Lucy, the elastic ended up being one inch too big and I had to take the whole thing apart.
 As you can see, the elastic is slightly smaller than the fabric waist. This is good! If they were exactly the same size and you sewed the fabric onto the elastic, you would never be able to stretch the elastic at all (unless you had used stretchy fabric). It would snap the thread as you tried to stretch the skirt on and off. Thus, the extra fabric length will give a slight gather to the skirt and create some “give”.
 Start pinning the elastic band to the skirt. Find the middle of the back of the skirt and pin that first. Pin the elastic so that it hangs about 1/4 of an inch on top of the skirt.
 Like this:
 Then flip the skirt over and pin it in the middle of the front of the skirt:
 Then pin the elastic down on both sides of the skirt.
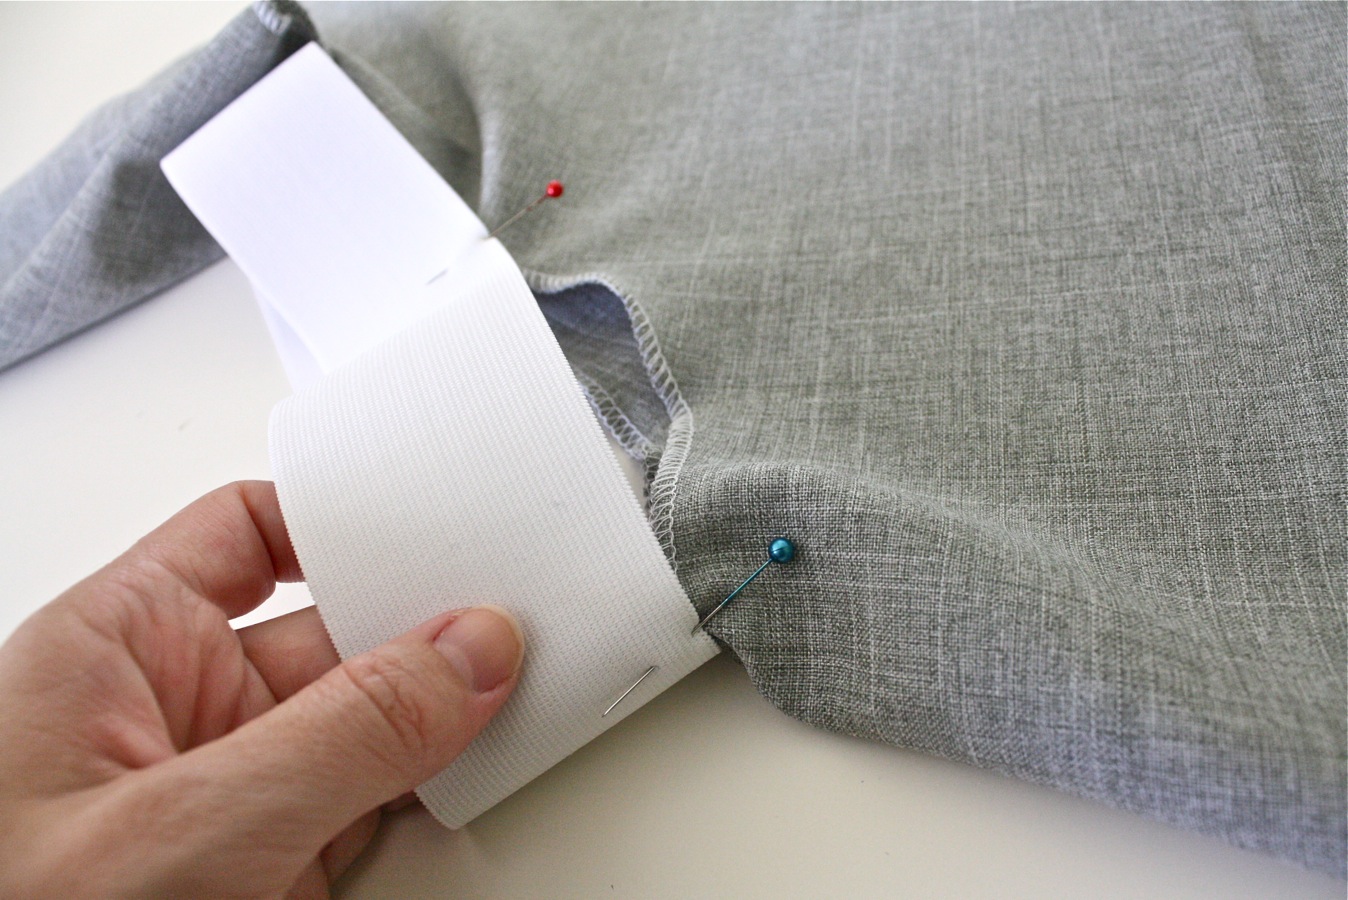 It should look something like this:
 Then continue cutting the gaps in half by pinning the elastic down. You can pin as much or as little as you like.
 I usually pin down about 8 spots:
 Now let’s sew it on. The important part here is that you need to stretch the elastic as you go, so that it’s taut with the fabric. Use both hands as you go, pulling it straight in the front and the back and sew from pin to pin, stretching it bits at a time.
 Here’s a side view. This is how it looks relaxed:
 And here’s how it should look when pulled taut:
 You’ll need your hand in the back to help guide everything through.
 You can use a zigzag or a straight stitch. I’ve tried both and prefer a straight-stitch because it looks a bit cleaner. When you’re done it should look like this on the outside:
 and this on the inside:
 We’re almost done! We just need to hem the skirt. Trim any uneven spots around the bottom of the skirt or if you want it to be shorter, cut off the extra length.
 Serge around the bottom of the skirt. If you don’t have a serger, iron the edge over 1/4 of an inch and continue to the next step.
 Iron the edge of the skirt under. I prefer a very small hem on this skirt so that it bounces and twirls better.
 Then sew the hem down, about 1/8 inch from the fabric edge.
 And you’re done!
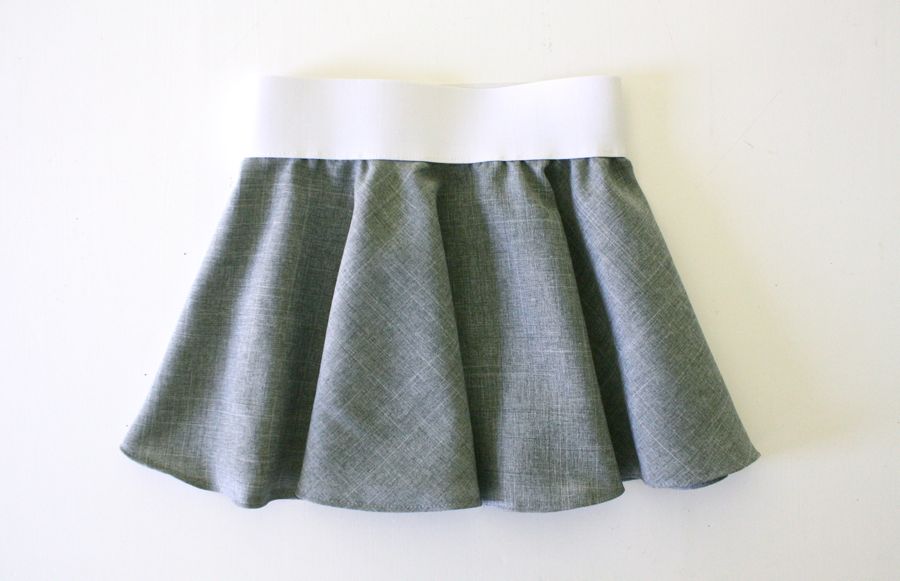

 Try it on,
 Give it a whirl!
 And enjoy a little treat.
 Happy spinning!
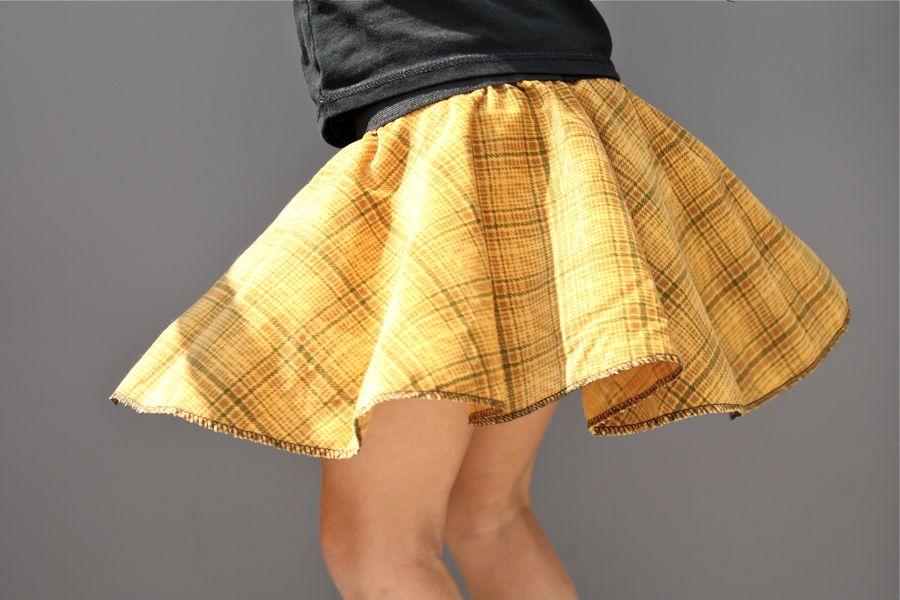 Tips for making an Adult version:
 * I followed the same instructions outlined in this tutorial.
* I recommend sticking to very lightweight fabrics. This skirt was made with a slinky polyester charmeuse (feels similar to a silky scarf) and it drapes beautifully. I made another version, which I’ll share later, with a thicker wool tweed and it adds a bit more bulk to the hip area. With Lucy, that’s not a problem. With me, I’d like to minimize the padding.
* 60-inch wide fabric works best. Depending on your waist size and the length of your skirt you can cut an entire circle using 60-inch wide fabric. My circle pattern just barely made it and took about 1 1/2 yards of fabric (I purchased 2 yards just to be safe).
* If you have 45-inch wide fabric, or if your circle is bigger than the fabric, you can cut two semi-circles and have two seams down the sides. You’ll have to do a little math to figure how many yards of fabric you need. Make your pattern first and then work out the math. I would recommend using fabrics with a pattern to disguise the seams.
* The dimensions of my skirt are:
Elastic waistband – 29 inches
Radius – 4.75 inches (appx)
Length – 22 inches (long enough to hit my knees).
I typically wear a size 4 or 6 in skirts.
Happy Sewing!

