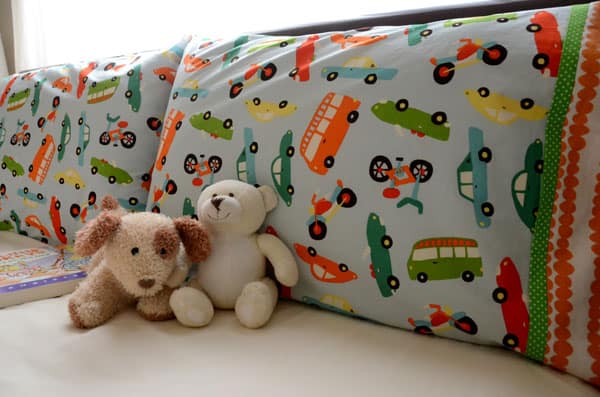
Thursday, June 5, 2014

Techniques

Pillowcase Pattern:: How to Make a Pillowcase ~ Burrito Style

Pillowcase Pattern:: How to Make a Pillowcase ~ Burrito Style

Do you need a quick pillowcase pattern?  Well I did.  You know how it is with kids; all of the sudden they change overnight.
Pillowcase Pattern

Well, a couple of weeks back my grandsons spent the night at our house.
The usual sleeping setup is D-Boy in the Queen-size bed and T-Bone in the Pack-n-Play.  This has been working for most of T-Bone’s two-almost-three years. 
Recently, Kitty and Mr. Wonderful set up T-Bone a big-boy bed with this quilt AND a Big-Boy Pillow.
Pillowcase Pattern

Now, when the boys are here, T-Bone is still in the Pack-n-Play, but now he wants it Big-Boy style ~ complete with his very own Big-Boy Pillow.
Guess what ~ I didn’t have a spare pillow or pillowcase for that boy.  I actually fished a pillow out of a pillow sham and passed it off as special.
What kind of grandma am I!  I should probably be put in the Granny Penalty Box for this one.
So, today I’m making both of the boys pillowcases.
I’m going to use the Burrito Method to assemble them.
Here’s what you need:
 
  • Main Fabric:  1 yard.
  • Cuff Fabric: 1/3 yard.
  • Trim Fabric:  1/4 yard.  Note:  This is totally optional.
  • Thread
  • Scissors
  • Size 90/14 or 100/16 Heavy Duty Needles
Step 1:  Find the Grain
Visit my tutorial here on how to find the grain.  It is important for your fabric to be squarely on the grain or you will have a twisted pillowcase.   Ask me how I know this.
Step 2:  Cut Out Fabric Pieces
From Main Fabric, cut 1 piece that is 27” x 40”
From Coordinating Fabric, cut 1 piece that is 9” X 40”
From Trim Fabric, cut 1 piece that is 2” X 40”
 
Step 3: Understanding the Process
It is important to understand what each piece is called.
The Main Fabric is the Pillowcase Body.
The Coordinating Fabric is the Cuff and will wrap around the Pillowcase Body.  Kind of like aburrito.
The Trim will be in between the Pillowcase Body and the Cuff.
 
Step 4: Assembling the Pieces
Lay the Cuff out flat with the right side facing up. 
Fun Idea:  Embroider or applique a name on the cuff before assembling the pillowcase.
 
With wrong sides together, fold the trim piece in half lengthwise and press.
 
Match the raw edges of the Trim along the top edge of the Cuff and pin to hold.
 
Place the Pillowcase Body on top of the Cuff/Trim with right sides together and pin.
Step 5: Why It’s Called a Burrito
Starting at the bottom of the Pillowcase Body, begin rolling the fabric towards the top edge. 
Continue to roll up the Pillowcase Body until it is a few inches from the top edge.
Take the bottom edge of the Cuff fabric and wrap it over the rolled up Pillowcase Fabric.
See how the Cuff wraps over the Pillowcase Body, like a burrito.
Pin through all layers of fabric.
Using a 3/8” seam allowance, sew along the raw edge.
Fold back the Cuff and carefully pull out the Pillowcase Body.
Press the Cuff and Trim on both sides.

Step 6:  Side and Bottom Seams
The next step uses a French seam.  If you’ve never sewn a French seam before, you can review the process here.
Fold Pillowcase in half wrong sides together, matching up the Cuff and Trim fabrics on the seam line.
Pin around the raw edges on the side and bottom of the Pillowcase.
Stitch together down the side and across the bottom using a 1/4” seam allowance.
Be sure that the Cuff/Trim seam is even.  I actually sewed this first, then went back and did the rest.
Clip the corner where the side and bottom seam meet.  This will help with the bulk when you turn the pillowcase.
Turn the Pillowcase wrong side out and press the seams down.  Using something like a knitting needle or chopstick, push out the corners.
Now, the Pillowcase is facing right sides together.  Pin the side and bottom seams. 
Stitch the side and bottom seams using a 1/2” seam allowance.
Step 7:  Finishing the Pillowcase
Turn the Pillowcase right side out and press the seams flat.
You now have enclosed French seams and the Pillowcase has no loose threads on the inside.
Best of all, each grandson will have his own pillow.
And, I am out of the Granny Penalty Box.
Signature

Make an Easy-to-Sew Lined Tote Bag

Click to Print
HGTV.com
http://www.hgtv.com/handmade/make-an-easy-to-sew-lined-tote-bag/index.html

Make an Easy-to-Sew Lined Tote Bag

A straightforward sewing project for tweens, teens or anyone new to sewing, this lined fabric tote bag is perfect for work and play.
Jessica Kesterson, Living the Swell Life
Lined Tote Bag

Materials Needed:

  • 1/2 yard cotton fabric
  • 1/2 yard of complementary cotton fabric for inner lining
  • 1/2 yard of heavy fusible interfacing
  • 42" of canvas strap
  • fabric scissors or rotary cutter
  • sewing machine
  • thread
  • iron

Cut Fabrics

Cut two 18"x14" rectangles of both outer and inner fabric choices then cut two 18"x14" rectangles of interfacing. Cut canvas straps into two 21" lengths.
Lined Tote Bag

Snip Corners

On the long side of all rectangles, snip a 2"x2" square from only the bottom corners. Repeat for interfacing. This will form the base of the tote.
Lined Tote Bag

Add Interfacing and Sew Sides

Press interfacing to wrong side of outer fabric rectangle. Tip: Follow the manufacturer's directions for heating and adhering your interfacing. Pin outer fabric's right sides together and sew straight 1/2" seams along the sides and bottom of piece. Note: Leave the top and two snipped corners unsewn. Press seams open.
Lined Tote Bag

Create Corners

Pinch together gaps in snipped corners, lining up the side and bottom seams in the center. Pin straight across and sew a 1/2" seam. This step adds depth to the bag and creates a flat bottom.
Lined Tote Bag

Sew Liner Sides and Corners

Pin right sides of inner (liner) fabric rectangles together and repeat the above steps.

Piece Together and Pin

Flip liner right-side out and place inside outer fabrics so that right sides are together. Tuck canvas straps between inner and outer fabrics so that two edges of one face the front and two edges of the other face the back of bag. Pin the end of each canvas strap approximately four inches from side seam then pin fabric edges together around perimeter of bag opening.
Lined Tote Bag

Sew Bag Opening

Beginning at a side seam, stitch a 1/2" seam almost all the way around the tote, stopping 4" before the starting point — this should catch all four ends of the canvas straps while leaving ample room for turning.

Turn and Press

Pull both fabrics and straps through the 4" gap, turning the tote bag right-side out. Lightly press with a warm iron to remove wrinkles.

Top-Stitch and Finish

Top-stitch around the tote bag's entire opening to finish edges. This will also help reinforce canvas straps and shut the gap left in the previous step for turning.
Lined Tote Bag

How to Make a Fitted Sheet

Edited by Judithavory, Bluetofu, BR, Skyepie47 and 7 others
You can make bedding yourself by sewing fitted sheets. While making flat sheets and pillowcases involves sewing in a straight line, a homemade fitted sheet can prove more difficult to sew. You can, though, learn how to make a fitted sheet yourself even if you're a beginning sewer. If you want to make the process of sewing fitted sheets even simpler, use a flat sheet instead of a large piece of fabric to sew the sheet.

Steps

  1. Make a Fitted Sheet Step 1.jpg
    1
    Measure the width, depth, and length of your mattress if you are sewing fitted sheets with fabric.
    • If you are using a flat sheet, you only need to measure the depth of the mattress.
  2. Make a Fitted Sheet Step 2.jpg
    2
    Cut a piece of fabric based on your measurements. It should measure the width of the mattress, plus 2 x the depth, plus an additional 16 inches (20.32 cm) for seam allowances and tuck-in (8 inches on each side), and the length of the mattress, plus 2 x the depth, plus 16 inches (20.32 cm). Width + (2 x depth) + 16" and Length + (2 x depth)+ 16"
  3. 3
    Prepare your corner markings. Along one outer edge, measure over the depth of the mattress plus 8 inches (20.32 cm) from the corner of the fabric. Mark this spot.
    • Measure up the depth of the mattress plus 8 inches from the marked spot. Put a dot at the spot.
    • Draw a line connecting that dot to the mark on the edge of the sheet. Draw another line connecting the dot to the edge of the fabric on the other side. This gives you a square on the corner of the fabric.
  4. 4
    Cut out the square, and follow the lines you drew. Repeat on the other 3 corners of the fabric or sheet.
  5. Make a Fitted Sheet Step 7.jpg
    5
    Fold the fabric, and bring the cut edges of each corner together.
    • The right sides of the homemade fitted sheet should face in.
  6. Make a Fitted Sheet Step 8.jpg
    6
    Pin the cut edges together at each corner.
  7. Make a Fitted Sheet Step 9.jpg
    7
    Make bedding by sewing the cut edges together with a .5-inch (1.27 cm) seam allowance.
  8. Make a Fitted Sheet Step 10.jpg
    8
    Continue sewing fitted sheets by folding the hems over .5 inch (1.27 cm). You can skip this step if you are using a flat sheet.
  9. Make a Fitted Sheet Step 11.jpg
    9
    Fold the hems over another .5 inch (1.27 cm), and pin.
  10. Make a Fitted Sheet Step 12.jpg
    10
    Sew the hems of the homemade fitted sheet.
    • Leave 1-inch (2.54 cm) wide gaps about 8 inches (20.32 cm) away from the sewn-together corners on each side of the sheet. This allows you to thread the elastic through to make the sheet fitted.
  11. Make a Fitted Sheet Step 13.jpg
    11
    Cut 4 pieces of elastic that measure 16-inches (40.64 cm) long.
  12. Make a Fitted Sheet Step 14.jpg
    12
    Thread 1 piece of elastic through the hem in 1 corner of the sheet. Pin 1 end of the elastic to the gap on 1 side.
    • Attach a safety pin to the end of the elastic to help you push it through the hemmed edge of the sheet.
    • Pull the elastic so that the sheet corner gathers around it.
    • Pin the other end of the elastic to the sheet on the other end.
  13. Make a Fitted Sheet Step 15.jpg
    13
    Sew the elastic in place on both sides of the corner.
  14. Make a Fitted Sheet Step 16.jpg
    14
    Finish making bedding by threading the elastic through the hems on the remaining 3 corners.